
Rainy Surface Shader Part 1: Ripples
Introduction
So this is going to be part 1 of a two parter that will cover how I created my Slope Aware Rainy Surface Material Function in UE4. This part is going to cover how to create rainy ripples/patters on surface that are hit directly by rain, so without further ado, lets get started!
Textures
There are 2 main textures we need to author for this Maerial Function, the first one is an RGB Channel Packed Msk Texture for the droplet,streaks and streak gradient. It is important to author this texture with proper gradient values for the shader to work accurately.
You can grab my Texture here

In this part, we are priamrily only going to be using the Red Channel with the droplet mask, in part 2 will make use of the other two channels to create the streaking effect
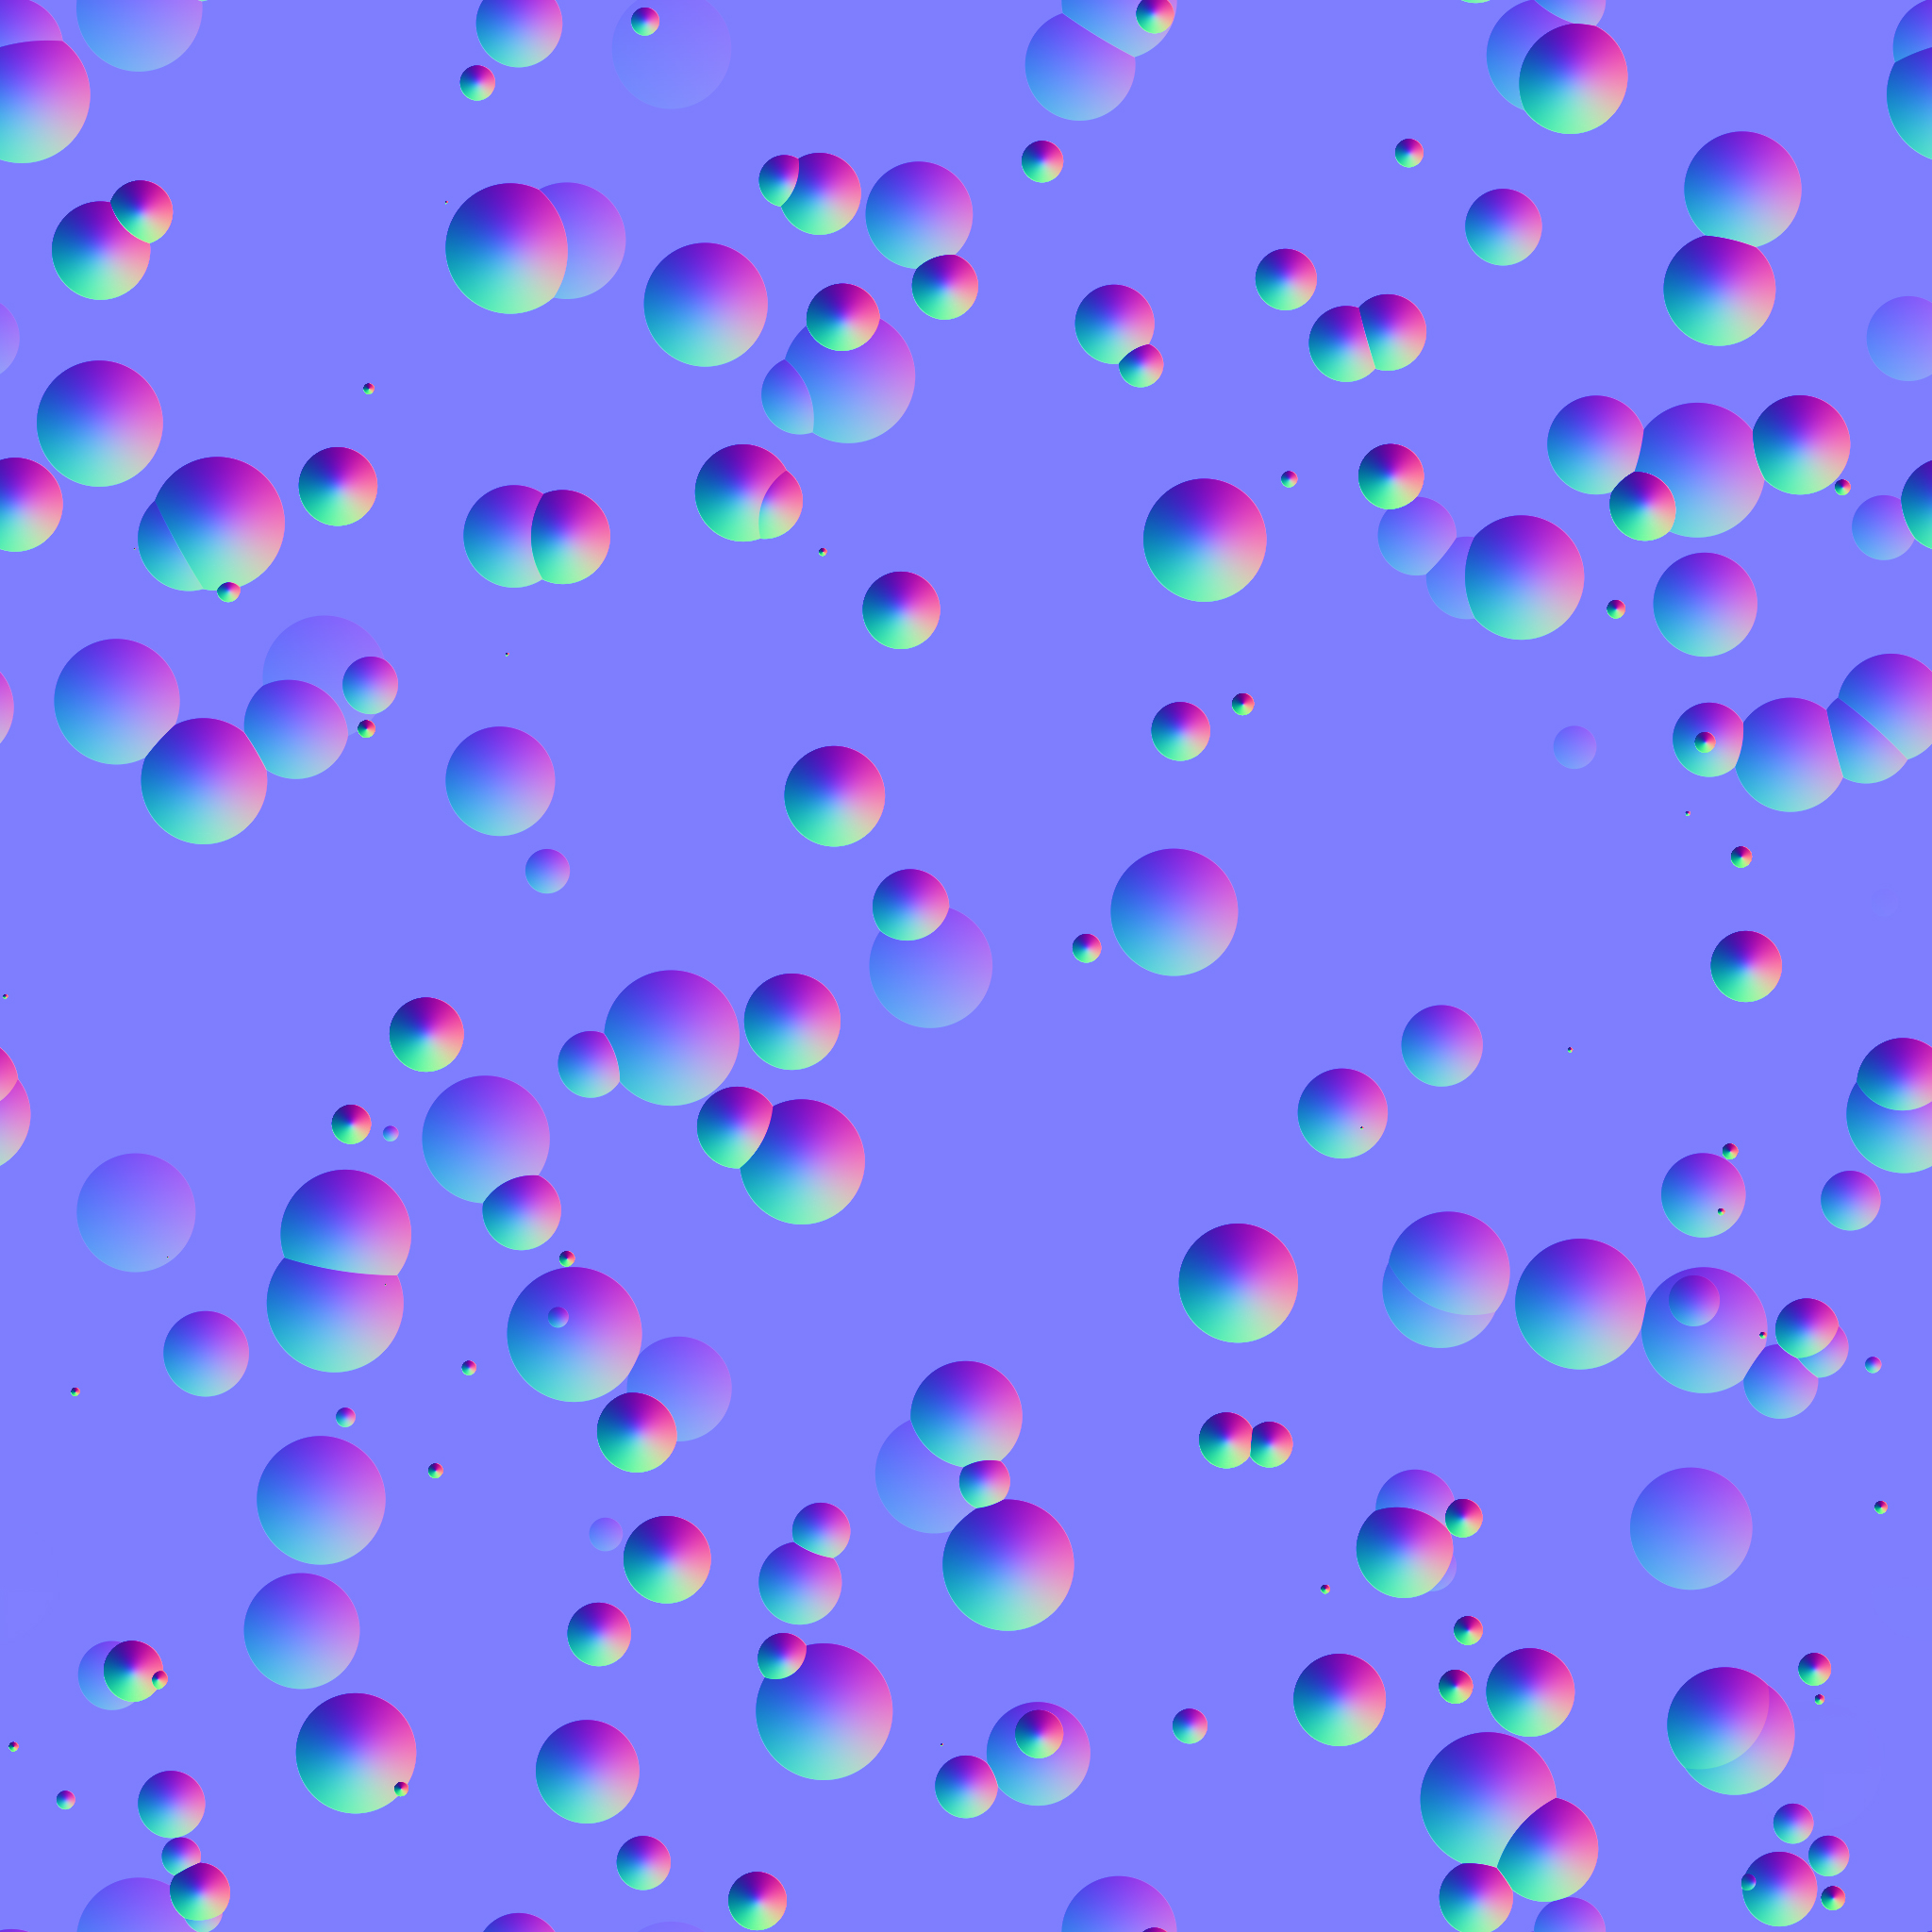
The other texture will be a normal map for the water droplets
Grab the normal texture here
Basic Concept
The basic idea is to use Alpha Erosion on the Pattern in the Red Channel of our channel packed texture, with some additional math to create the ripples
So lets get started, create a new Material Function in UE4 and name it whatever you want, I called mine "MF_Ripples"(this is a temporary function, later in part 2 of this article we will combine what we create in this article) and set up the nodes as shown below
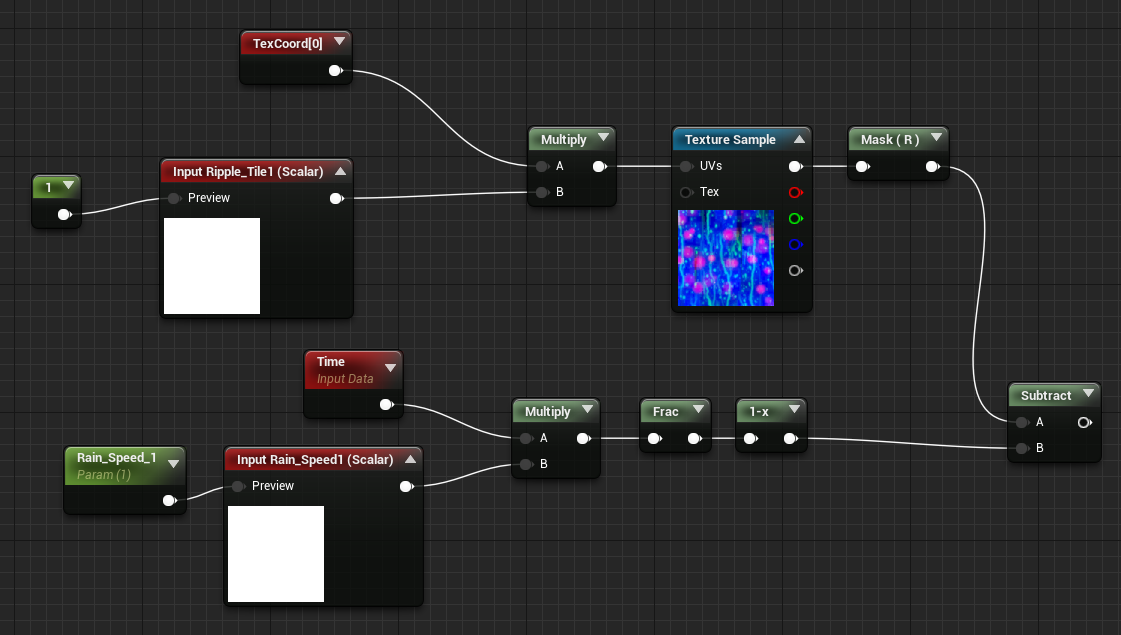
The Above network creates a basic Alpha Erosion setup, since we are making a material function, I've also setup two Function Inputs to Control Tiling and Rain Speed
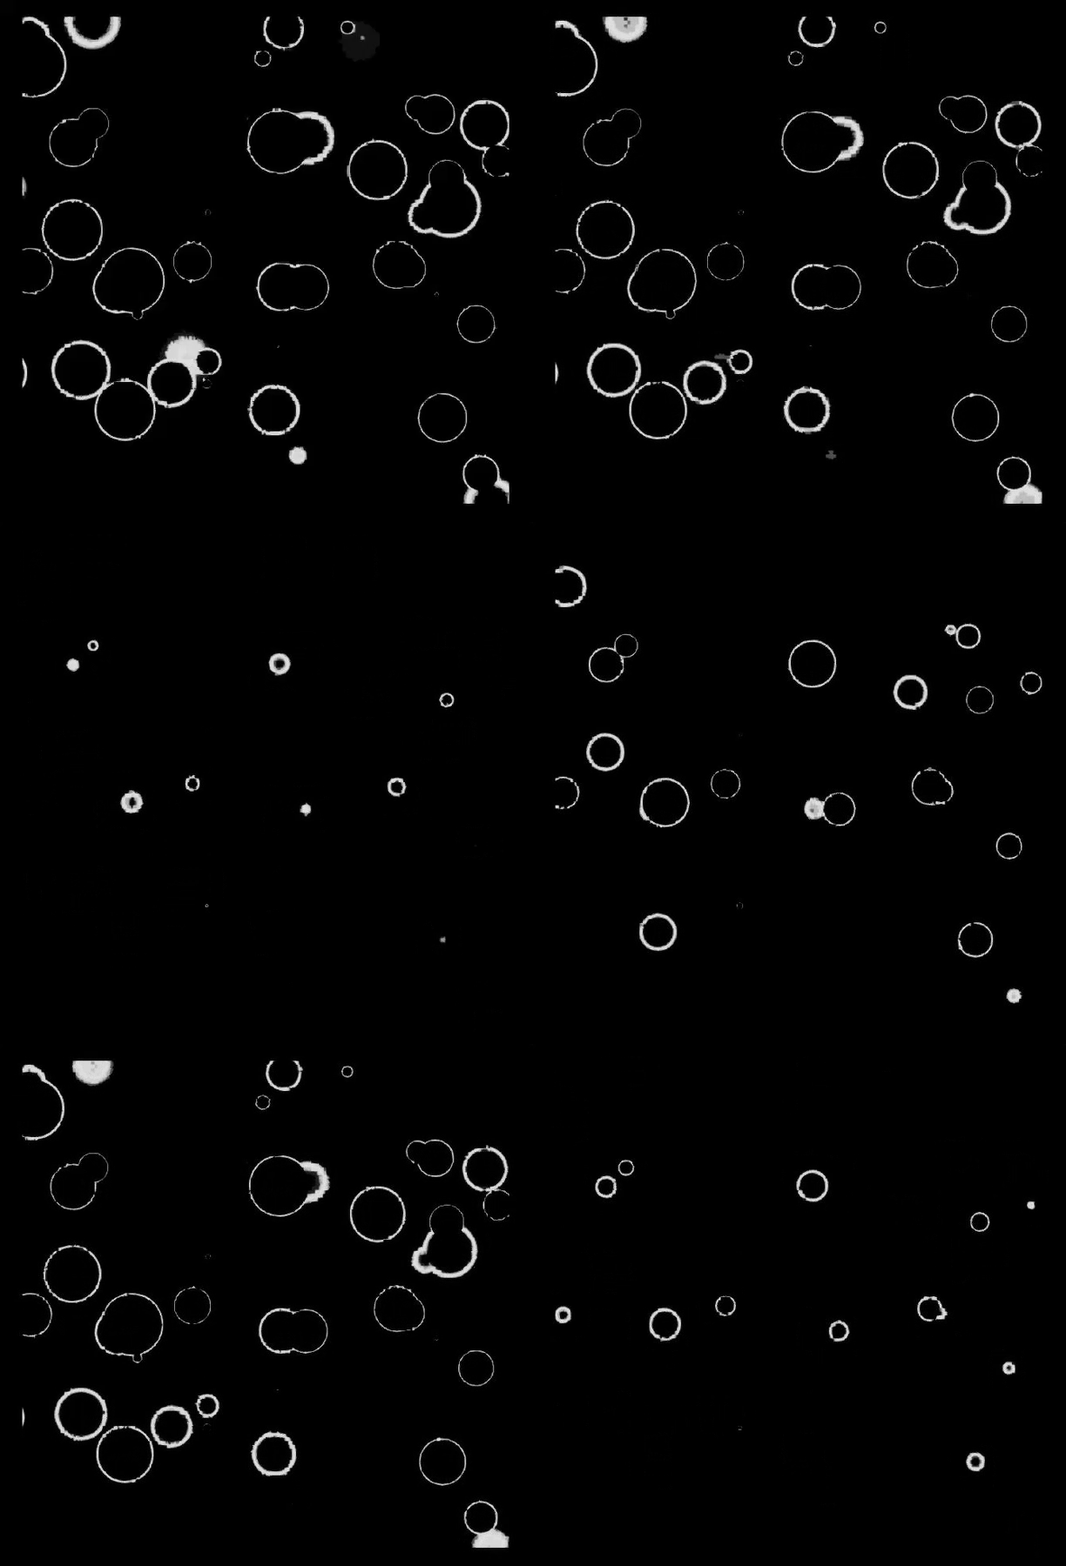
The above equation gives us a simple period going 0-1, 0-1, we subtract this value from the Red Channel of our Texture, which gives us the Aplha erosion Effect Seen below
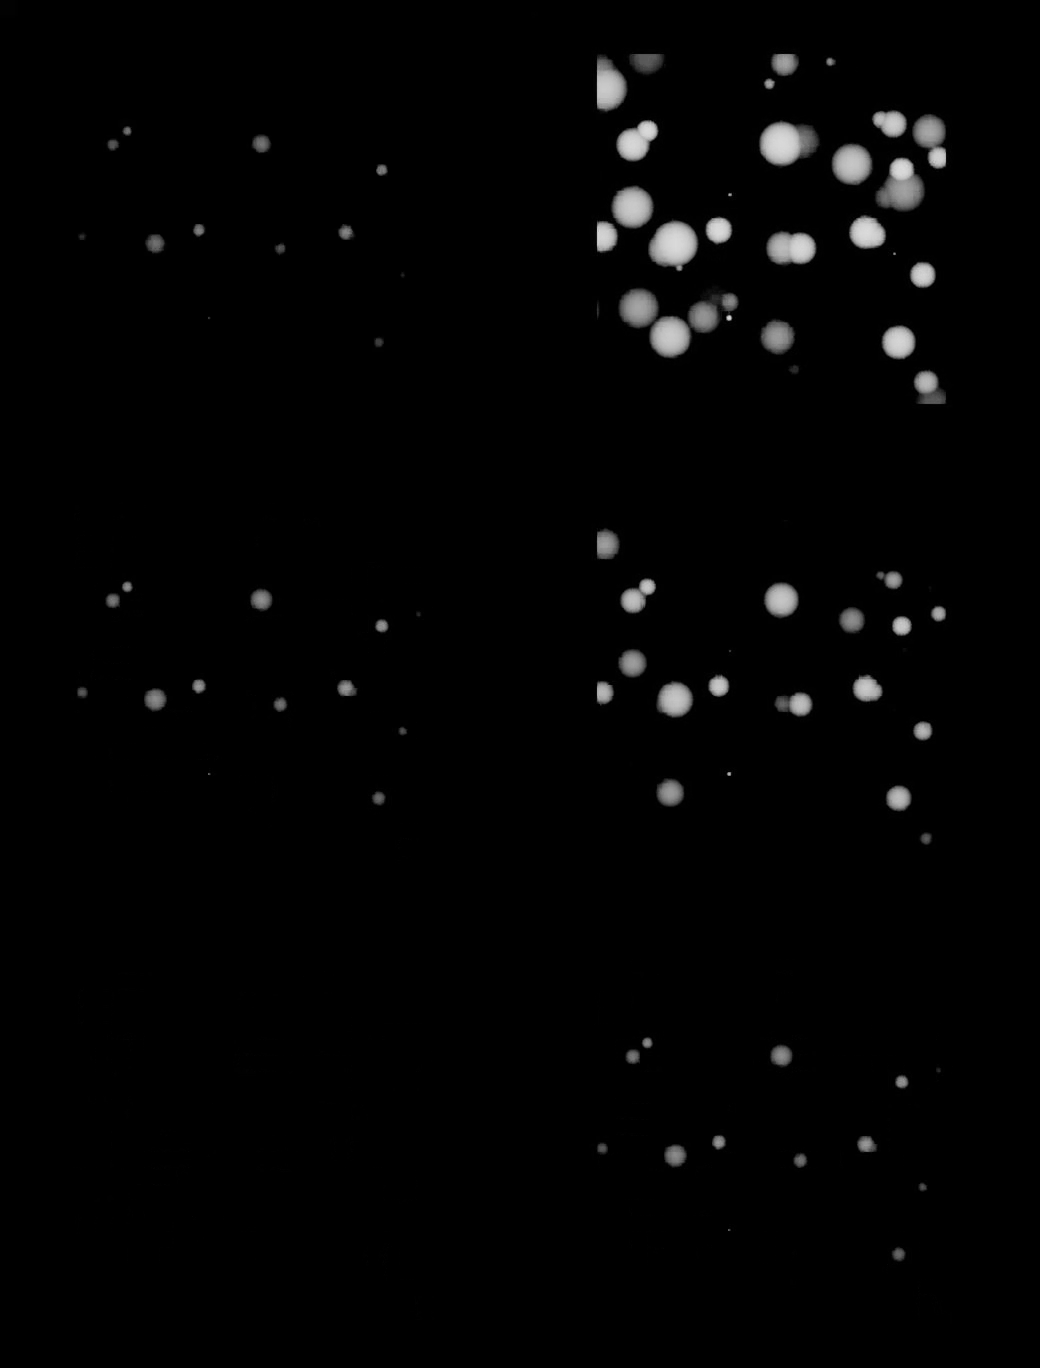
Now we can use some math to create a simple edge mask to that the expanding dot's look like ripples instead. Take the result from the Subtract node and do the following:
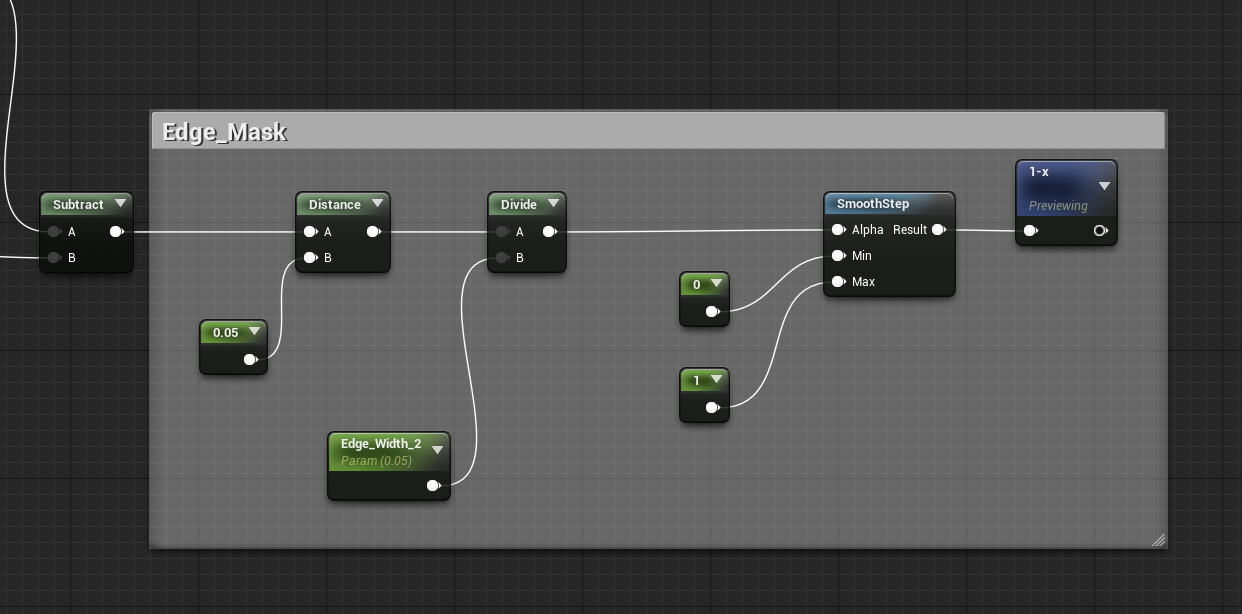
This will result in the edges of the dots getting masked out to give us something that looks like and expanding ripple
This is pretty good, but the ripples appear and disappear too abruptly, we need to make them fade-in and fade-out over time to make it look more natural. We can achieve this with a little bit of math:
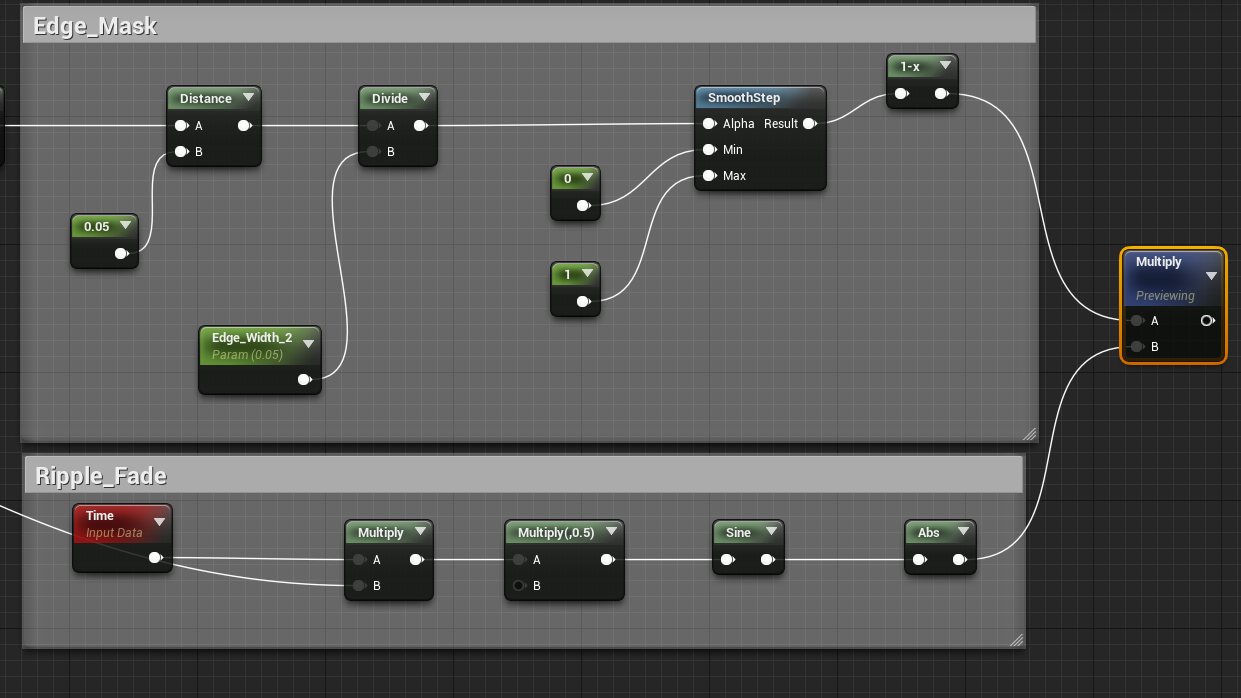
The Time is multiplied by the RainSpeed variable we made earlier.
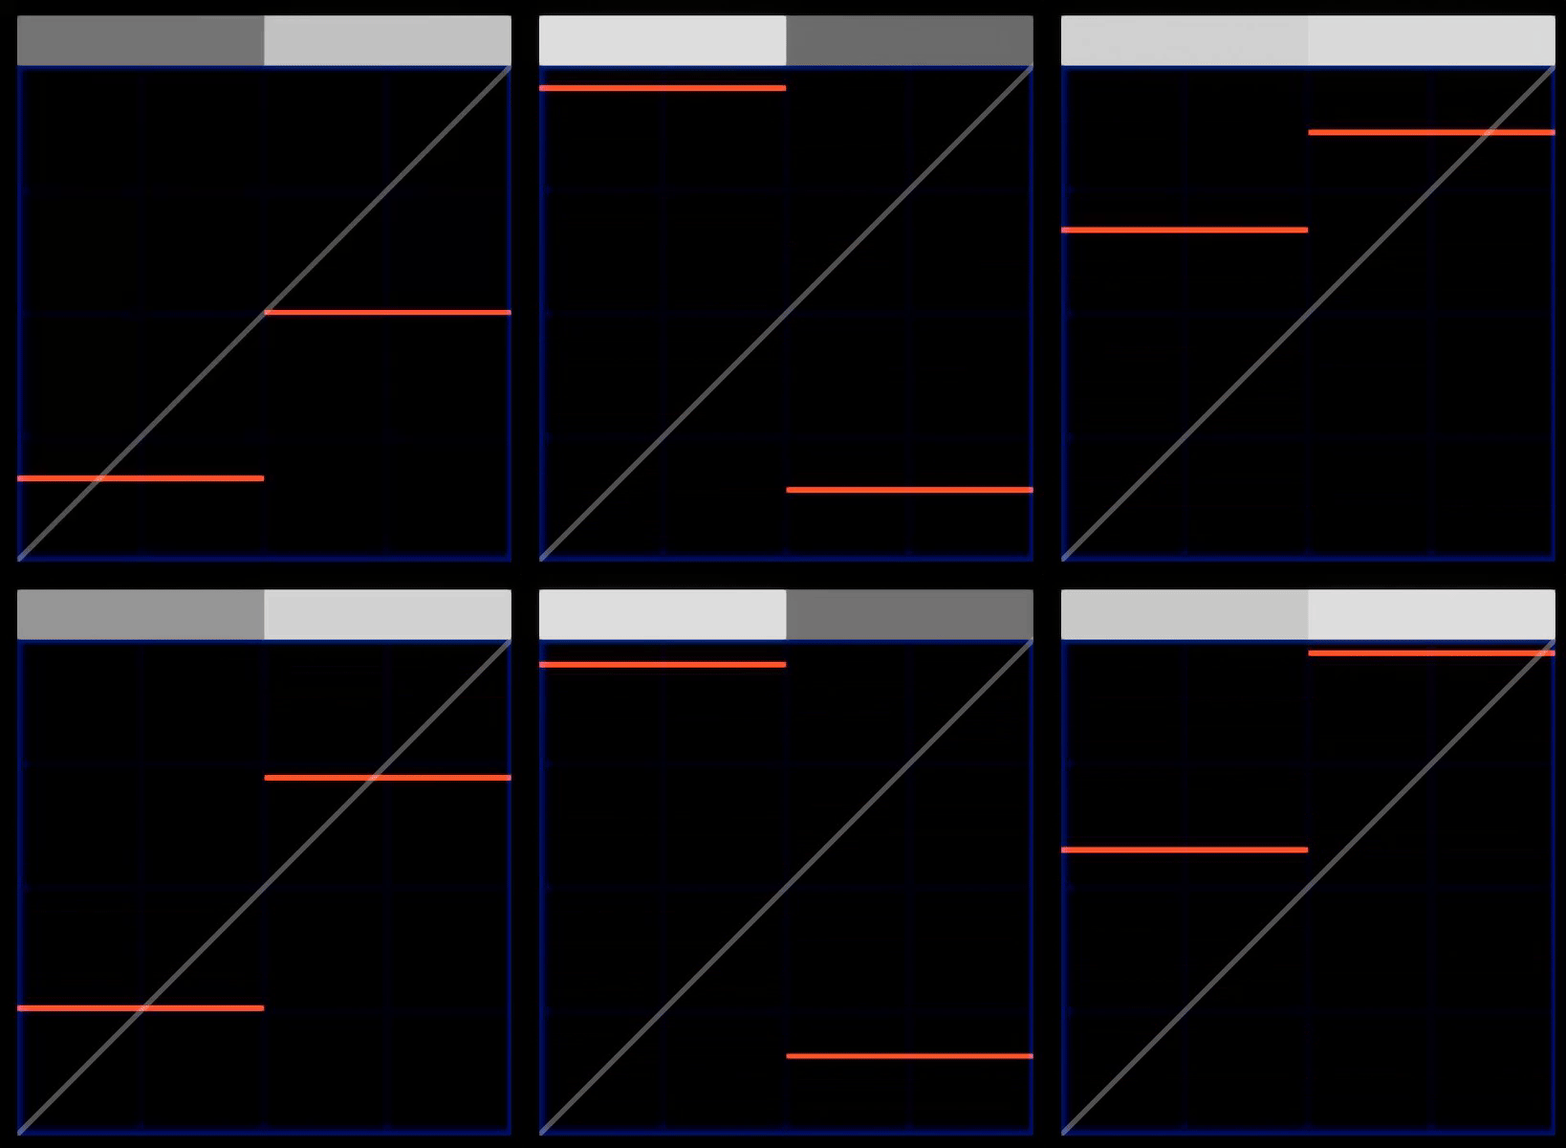
What we are doing is multiplying the result from the Edge Mask with a absolute sine-wave i.e without the negative part, it has a period that goes [1,0,1] instead of[1,0,-1,0,1]. We have also remapped the time in this sine-wave so that it goes [0,1,0] in the same time that it takes our alpha erosion Time Function to go from [0-1]. This is visualized in the graph below.
The Equation that we multiply is
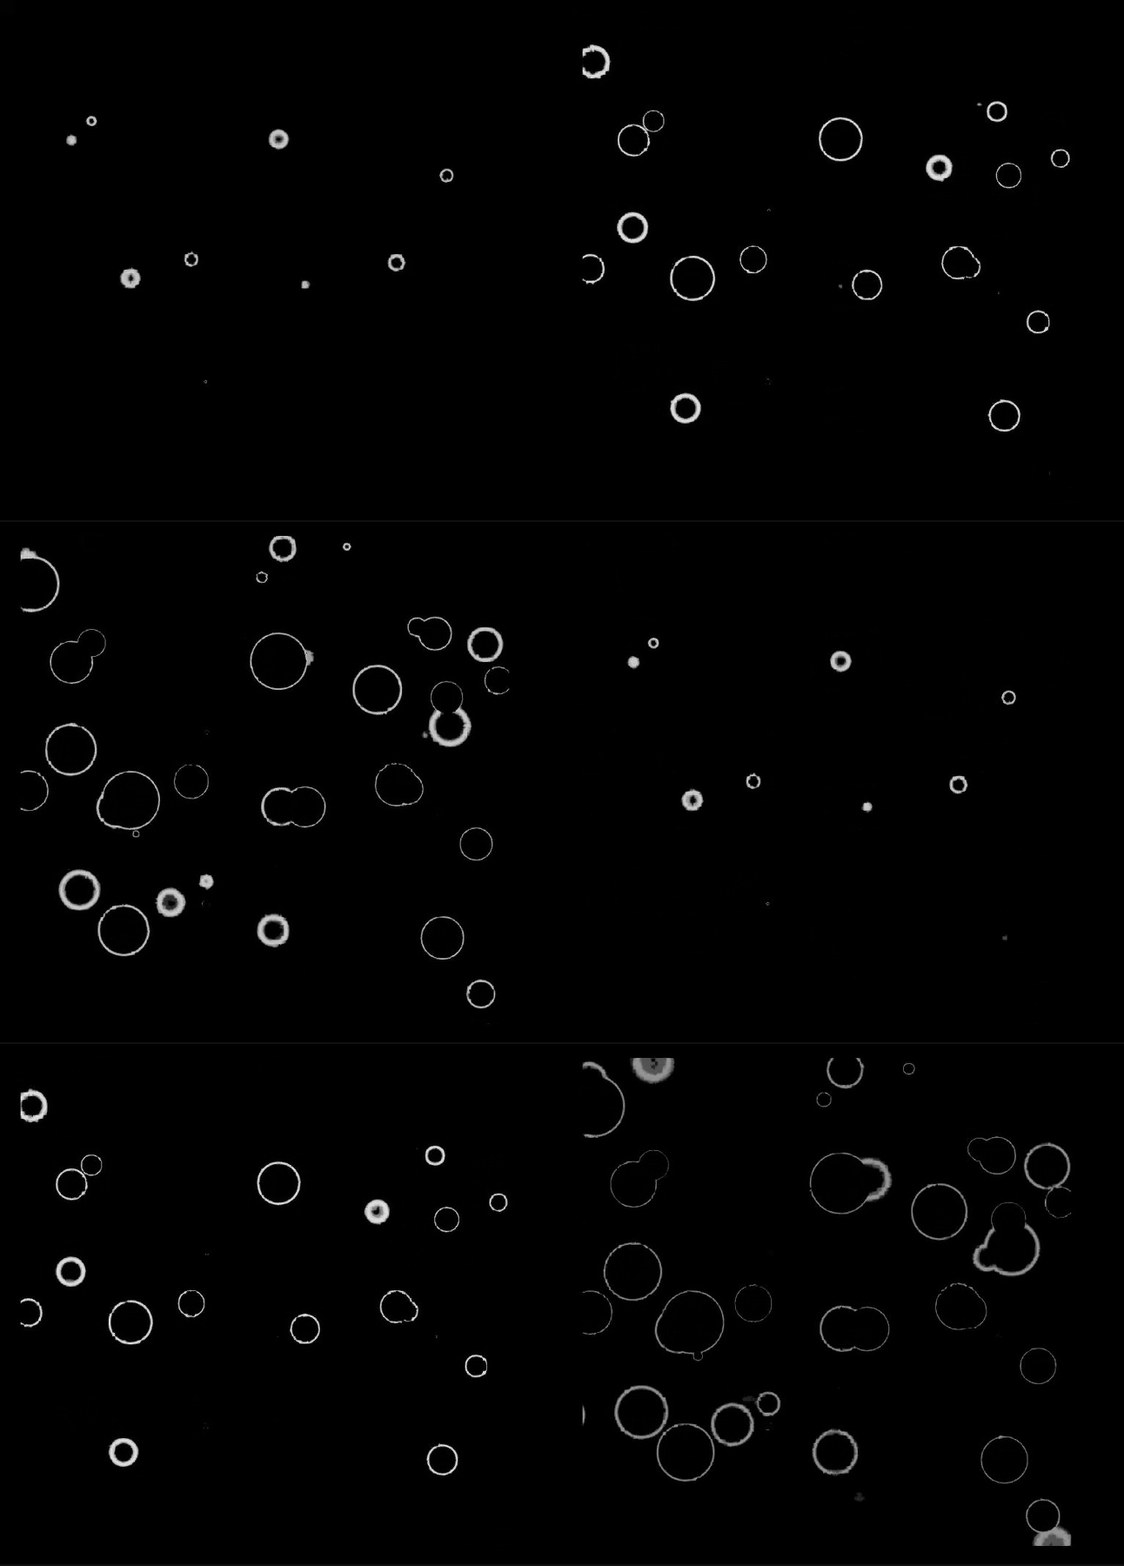
This result's in a nice Fade-out of the ripples as they reach their maximum size, as shown below
Hiding the Time Loop
This looks pretty good, but one big issue at the moment is that the rippling isn't continuos, there is hard period where the ripples reset and start, we need to find a way to hide this effect, this can be achieved by creating a Time-Offset version of this current setup and combining the two together:
So copy and past the current node network and place it above so that current one make these small changes marked in the image
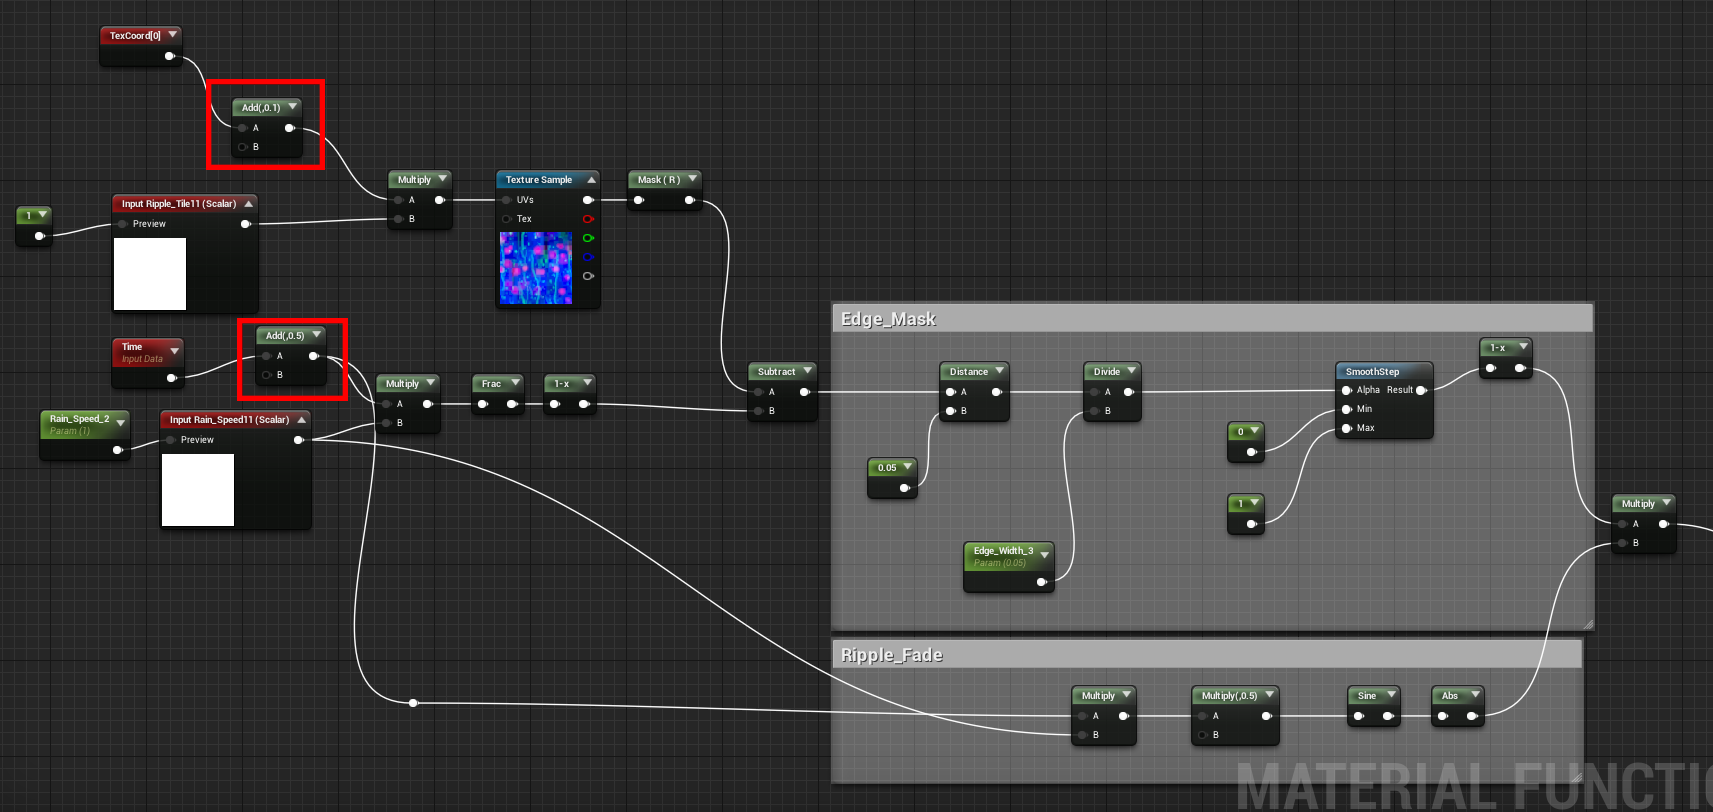
Note:Do not copy and paste the Input variables, just connect the existing ones to the second network of nodes:
Note:I've also used a single time variable for both equations, so that the time offset is universal, and we don't have to repeat it for each time node we use
So we've done two things, first we've offset the UV's by 0.1 so that the second set of ripples aren't in the same spot as our first group.
Next we add a time offset of 0.5, so that these ripples start and end with a 0.5s frequency offset compared to the first network.
You can see the two time frequencies visualized in the graph below
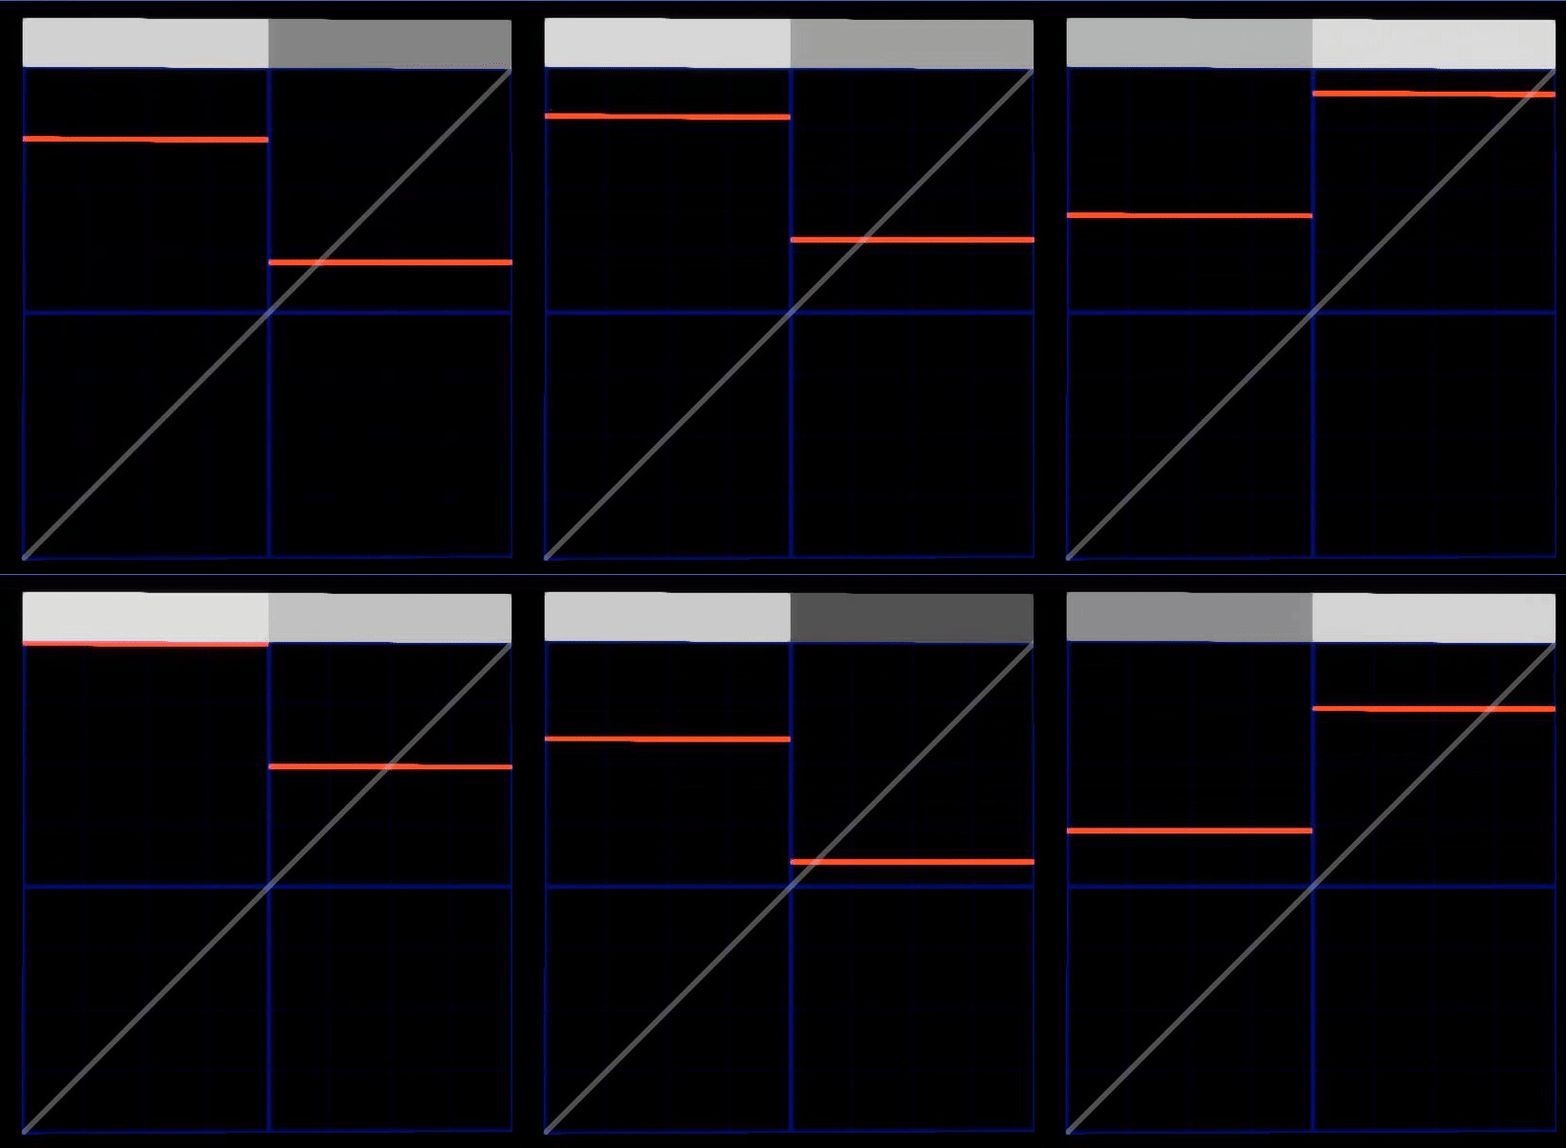
Now we can blend between these two sets of ripples, with a Time function that is at exactly the same frequency to hide the abrupt starts and a get seamless ripples.

Note: Time is multiplied by the RainSpeed Variable.
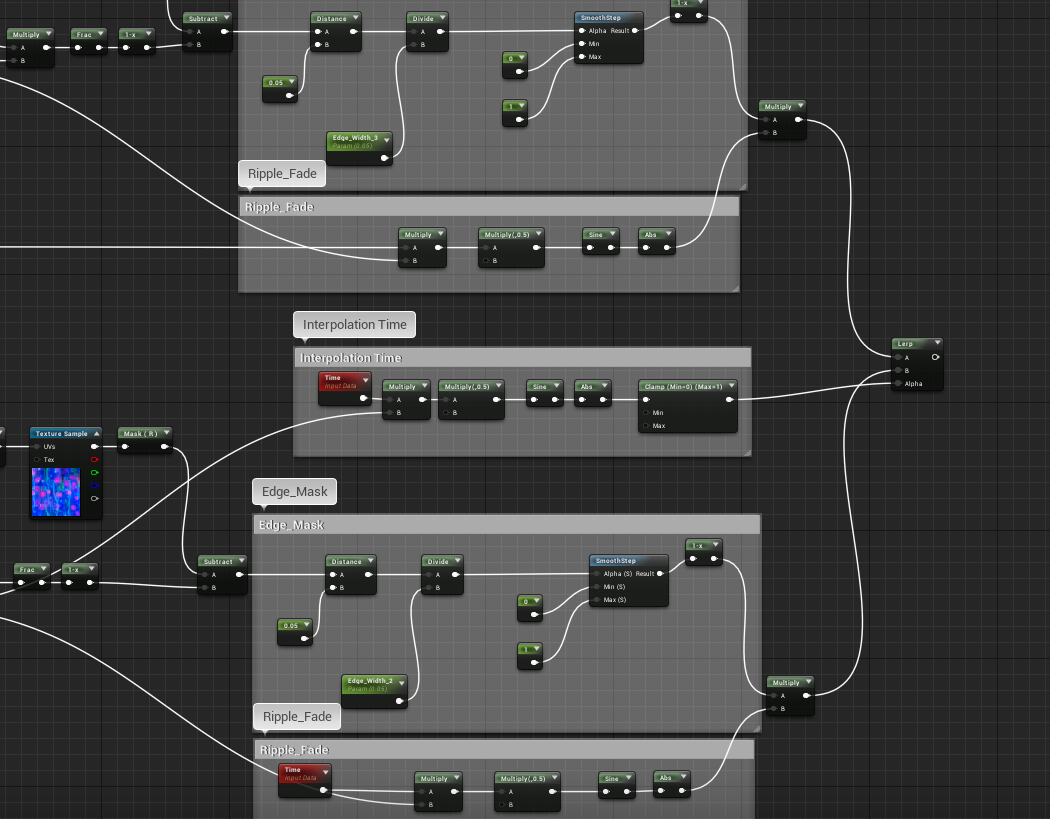
Now we use this Interpolation TIme Function as the alpha to Lerp between the two sets of ripples, which gives us seamless ripples.
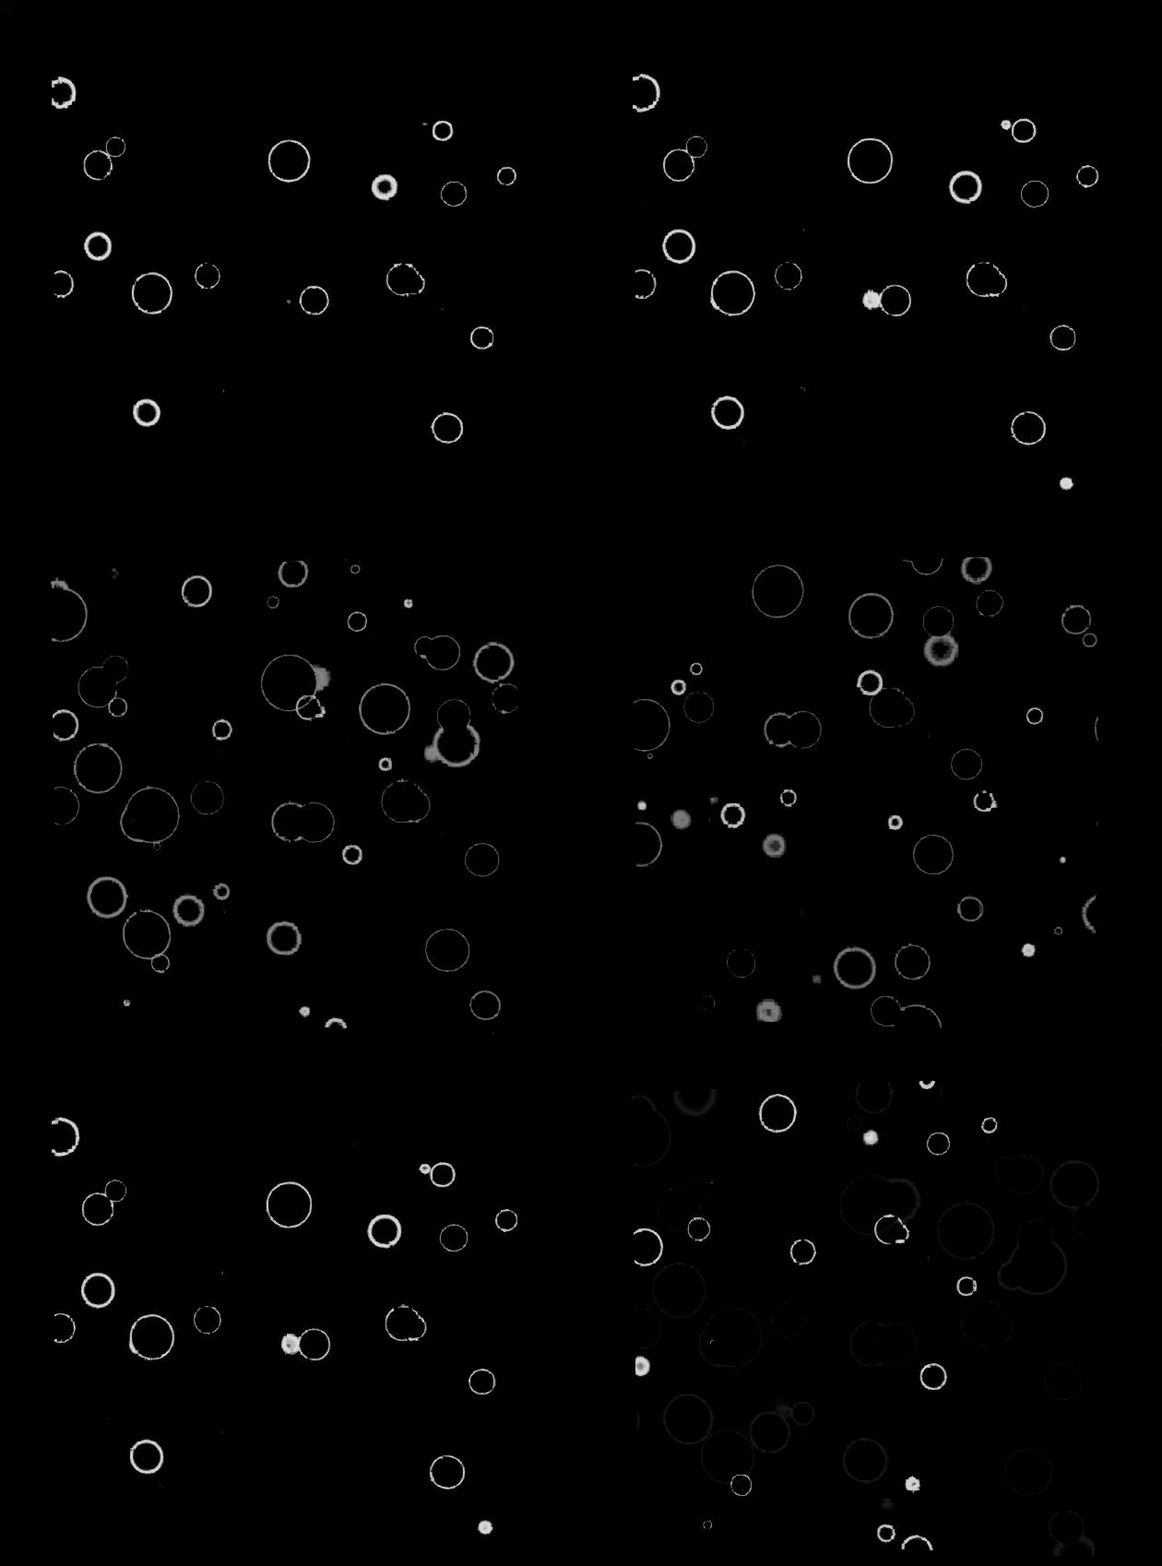
Ripple Normals
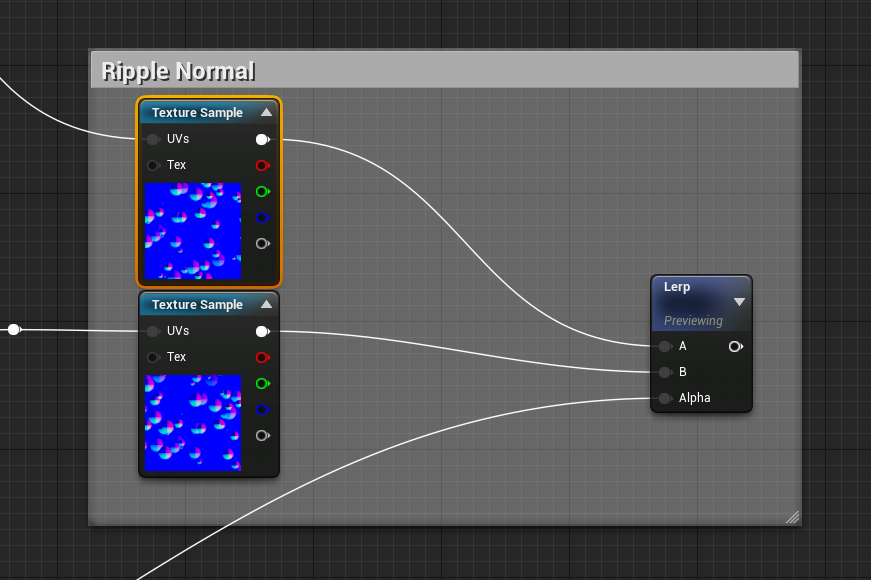
The Normals for the ripples are starightforwad to set up, we just use the texture coordinates from the two sets of ripples and feed them to two seperate TextureSamples of teh same Normal Texture that I linked earlier, then we blend between these two normals, with the same Time Interpolation Function.
Wet Surface, Water LookDev, Inputs from Base Materials
All the basic setups for the ripples are done, now we jsut need to setup ways to get Inputs from a base material(BaseColor,normal,metallic,roughness) so that we can blend in the ripples and wetness.The following sections will cover how to do that.
BaseColor
For the BaseColor, we need to add a Function Input to Recieve the basecolor from the base material so that we can overlay the water color. We then overlay a water color and blend it using the ripplemask that we just created.
First add 4 Function Inputs WaterBrightness(Scalar),BaseColor(Vector3),WaterColor(Vector3),Metallic(Scalar)
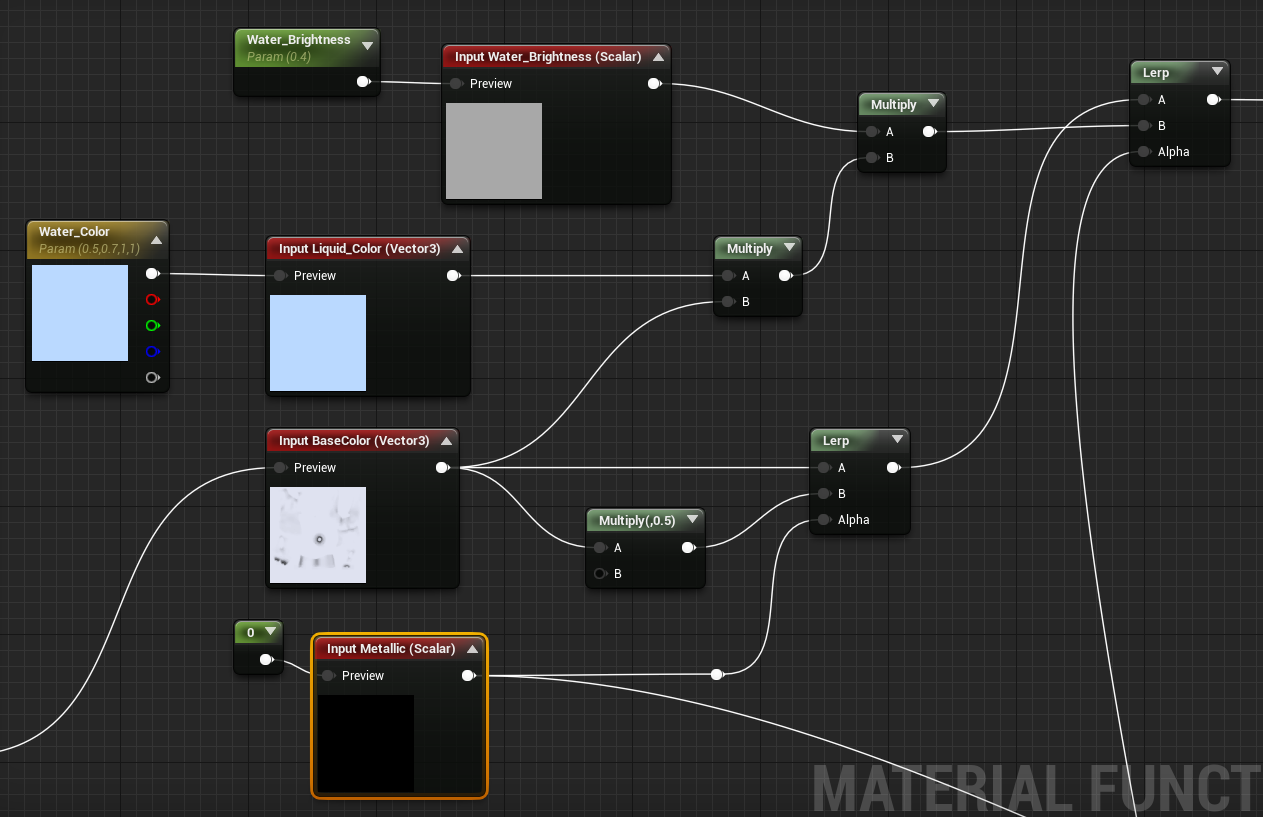
We take the BaseColor Input and multiply it with the watercolor and then with the water brightness, this creates teh basecolor for the ripples.
We also take the basecolor and multiply it by 0.5 to make it darker in color, we do this becasue most surfaces become darker in color when wet, there are some exceptions mostly metals/non porous materials.This is why we use the Metallic input to lerp between the regular basecolor and the one that is multiplied to be darker.
We the ninterpolate between these to results with teh Ripple mask to create the final baseColor output.
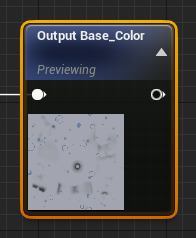
Create a Function Output called Basecolor and plug it into that
Normal Blending
In this section we create a function input to read the base material Normal Information and then overlay the ripple normals on top of it.
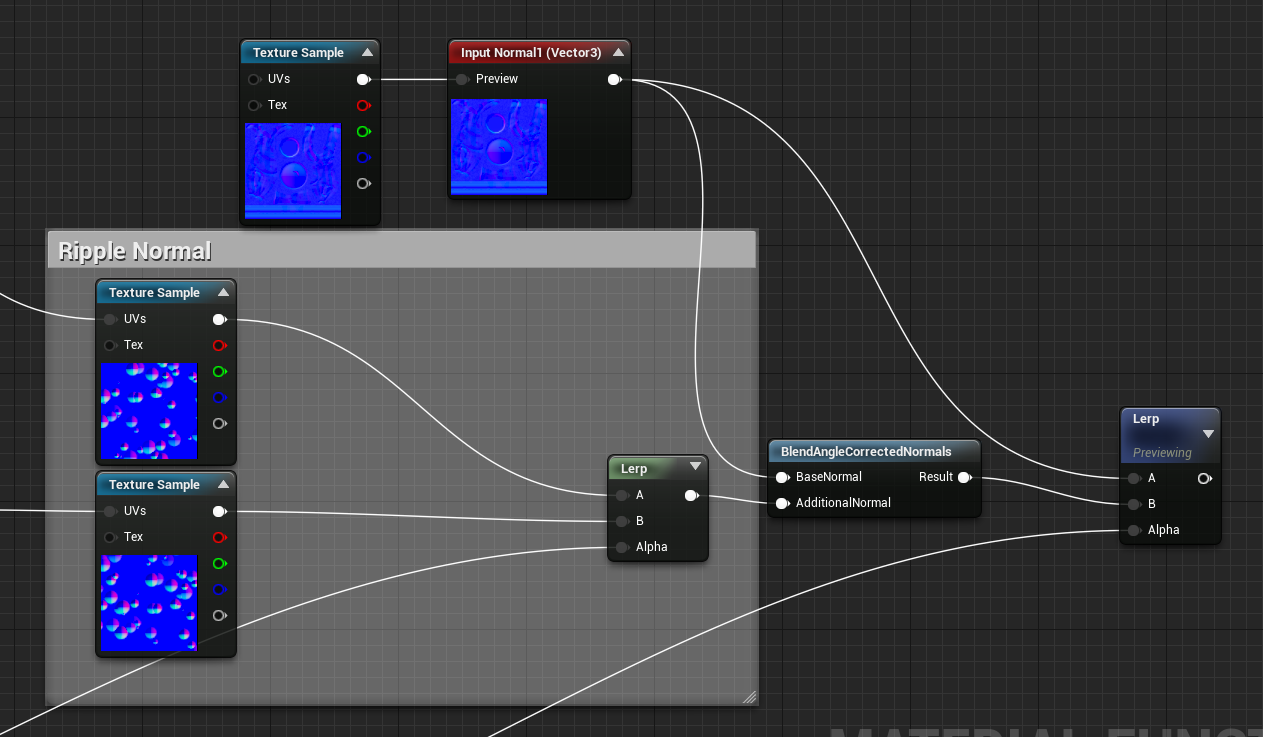
We take the ripple normals we created earlier, and combine it with the base material normal info using the handy Blend Angle Corrected Normals Function, we then lerp between the base material normal and the overlayed normal using the ripplemask
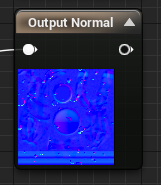
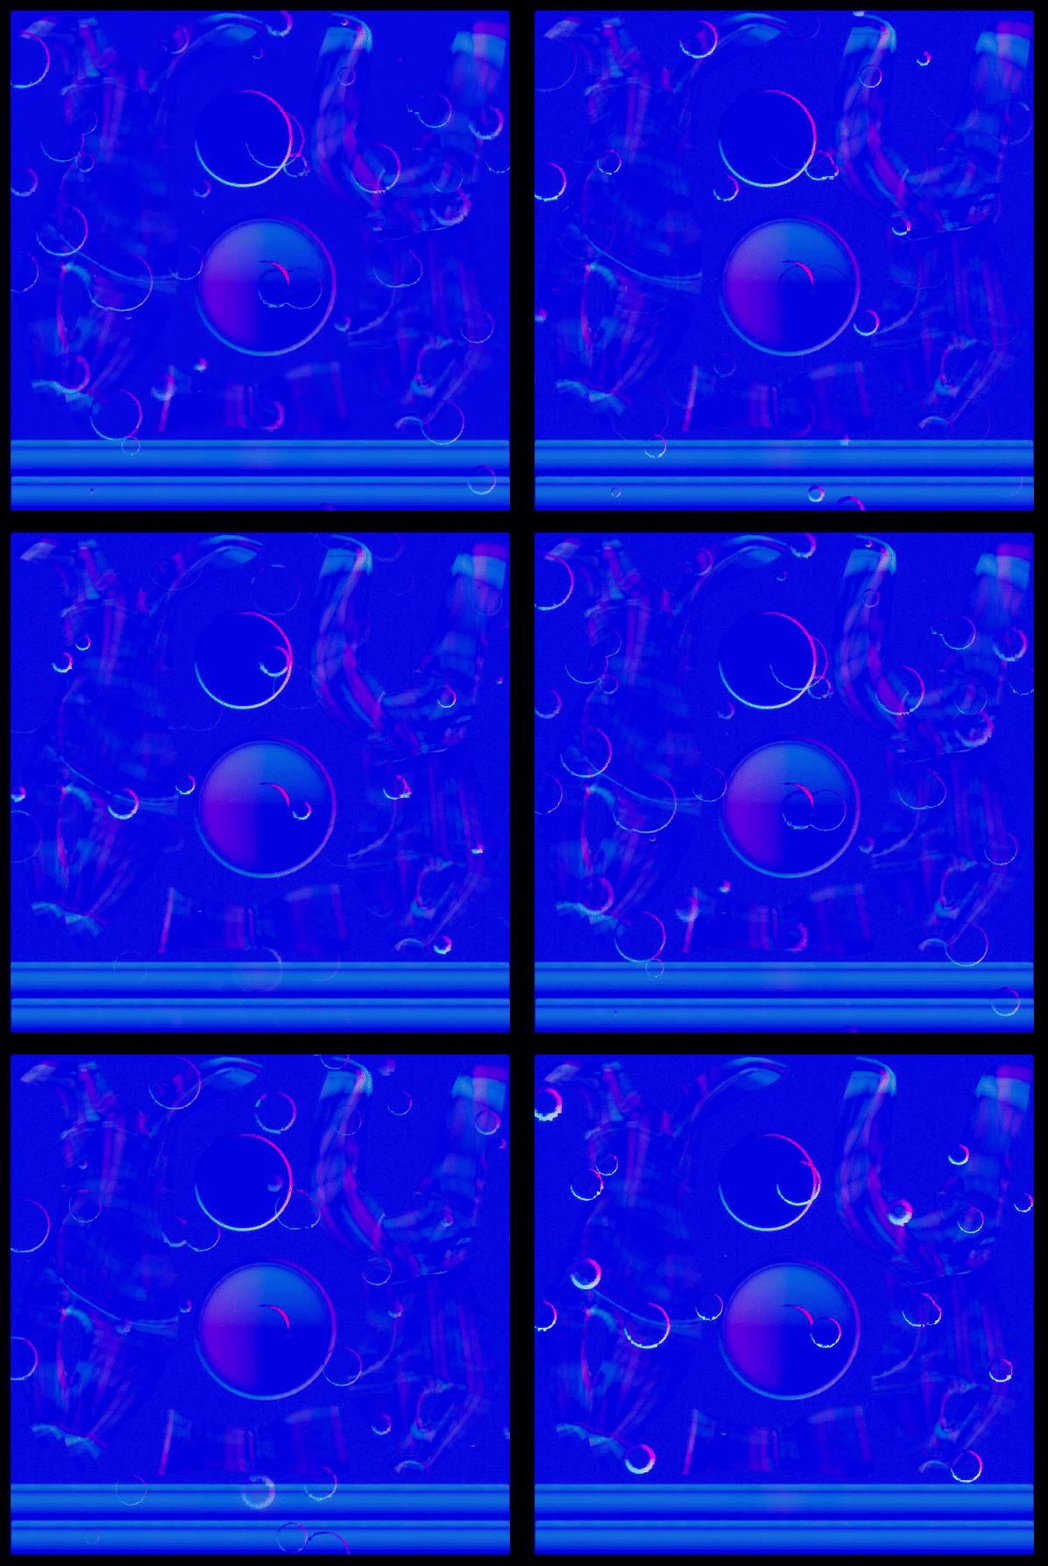
We then create a Function Output called Normal and plug the result into it.If you preview the result, you will see that the ripple nomrals are overlayed:
Metallic,Roughness
The metallic and roughness setups are pretty straight forward:
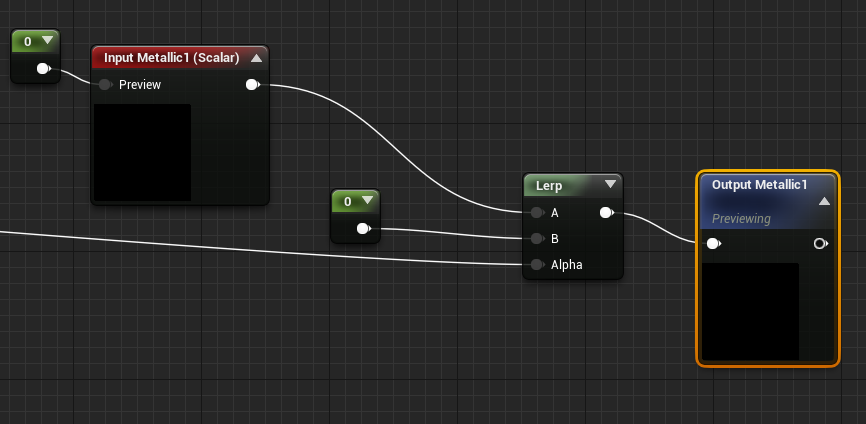
For Metallic we set up a function Input to read the Base Material Metallic value and we linear interpolate it with a value of 0.0(I'm not sure what the correct metallic value to use for water is but I liked 0.0,since..well water isn't metal)using, again the ripplemask as the alpha and then plug it into a function output called Metallic.
For the roughness as well we set up an Input function to read the Values from the Base Material, multiply it by a value of 0.5(because once a surface is wet, it tends to be shinier), and then Lerp it with a value of 0.0 using the ripplemask for the alpha.Then same as before we create Function Output for Roughness and plug it into that.

And that's pretty much all we need in our function for now, we can off create more ripple networks to add more variation, but for now this is enough, another thing we could do is add refraction options so that, the water actaully refracts and bends the light on the surface, this is something I'll cover in part-2 when we look at streaking and slope awareness.
We could also blend between ripples and patters based on vertex painted puddles so that the ripples only appear in areas with puddles and it patters on solid surfaces. Again stuff that will be covered in part-2.
Using the Function
Now in the detail's panel we can expose the function to the library and access it in any of our other shaders, and alyer it.

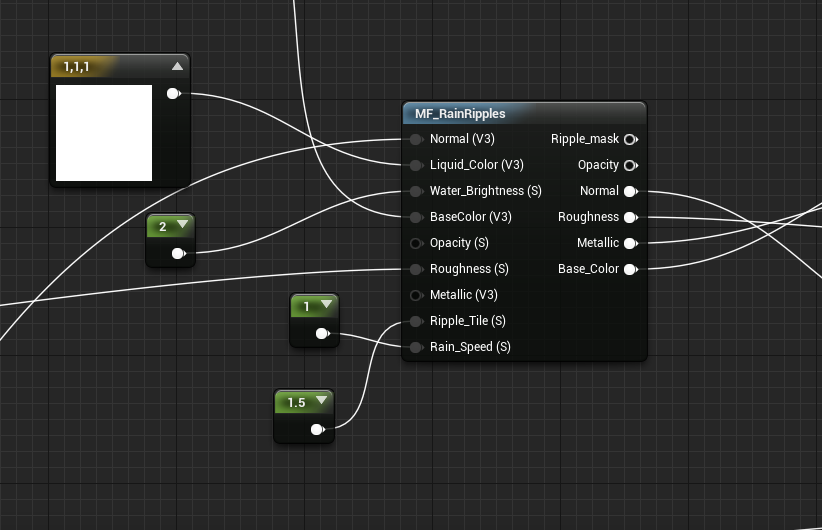
Below you can see how I've added teh function to one of epic's default tile materials, jsut feed in teh appropraite inputs and use the outputs from teh function as inputs forthe base shader.
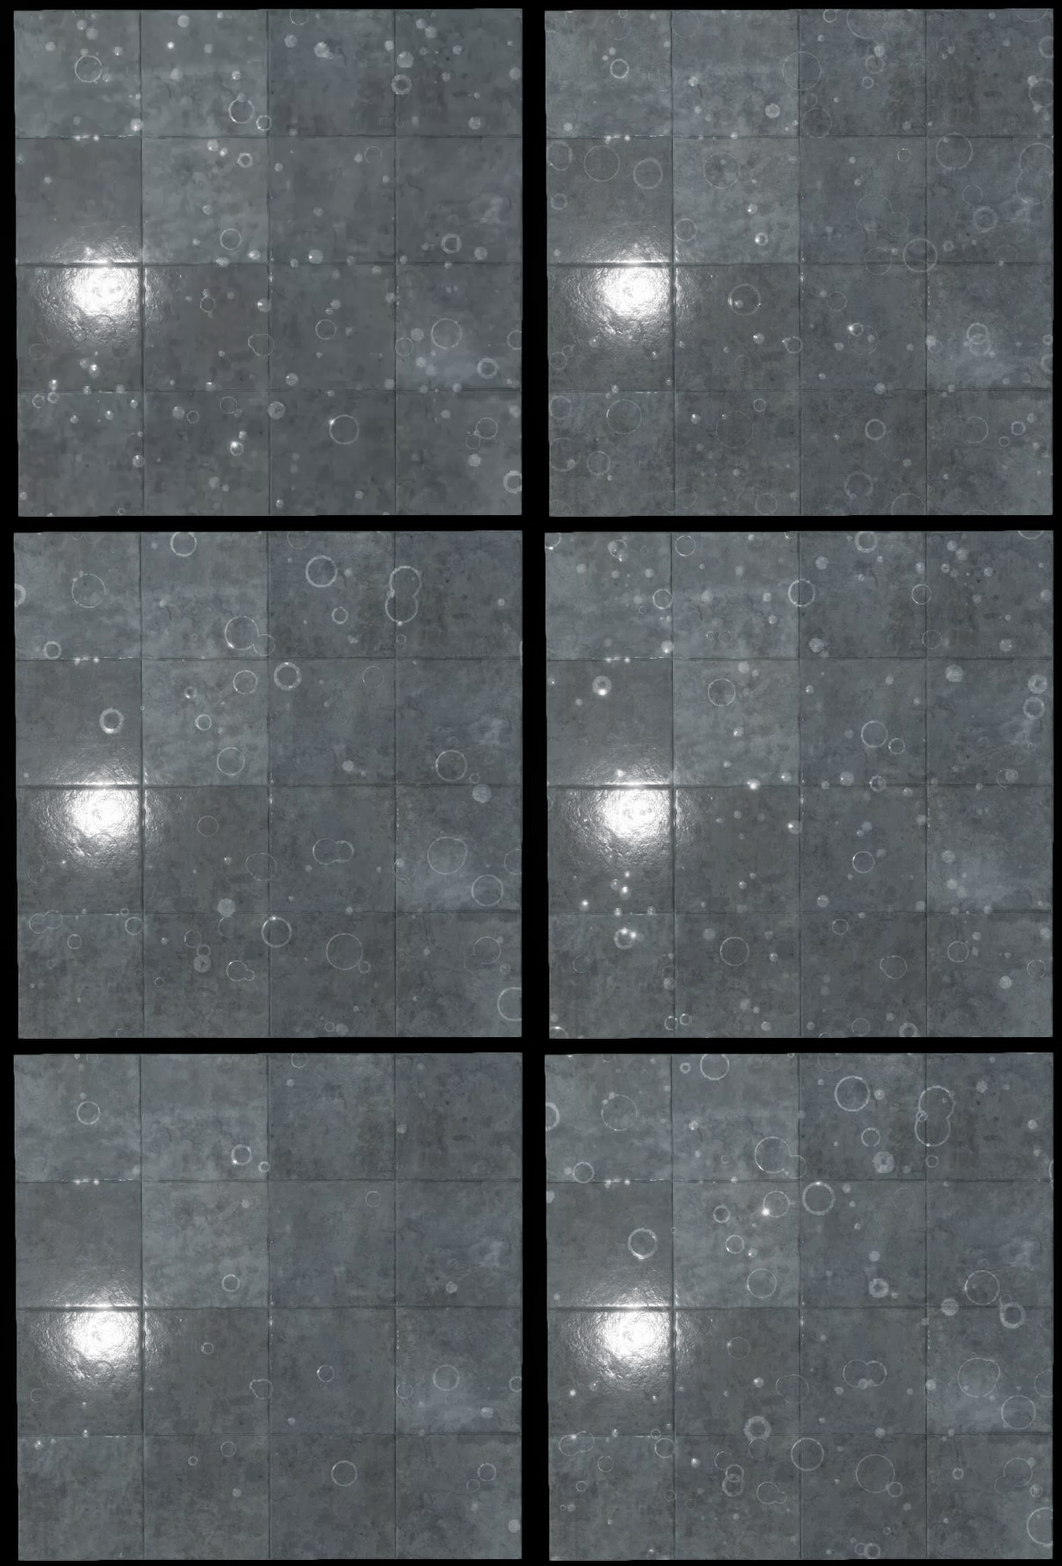
I hope you found this useful, part 2 will cover slope awareness and streaking, and potentially creating a BP controlled Wind Actor to dynamically update streaking direction etc based on it. Coming Soon-ish!
